 Save
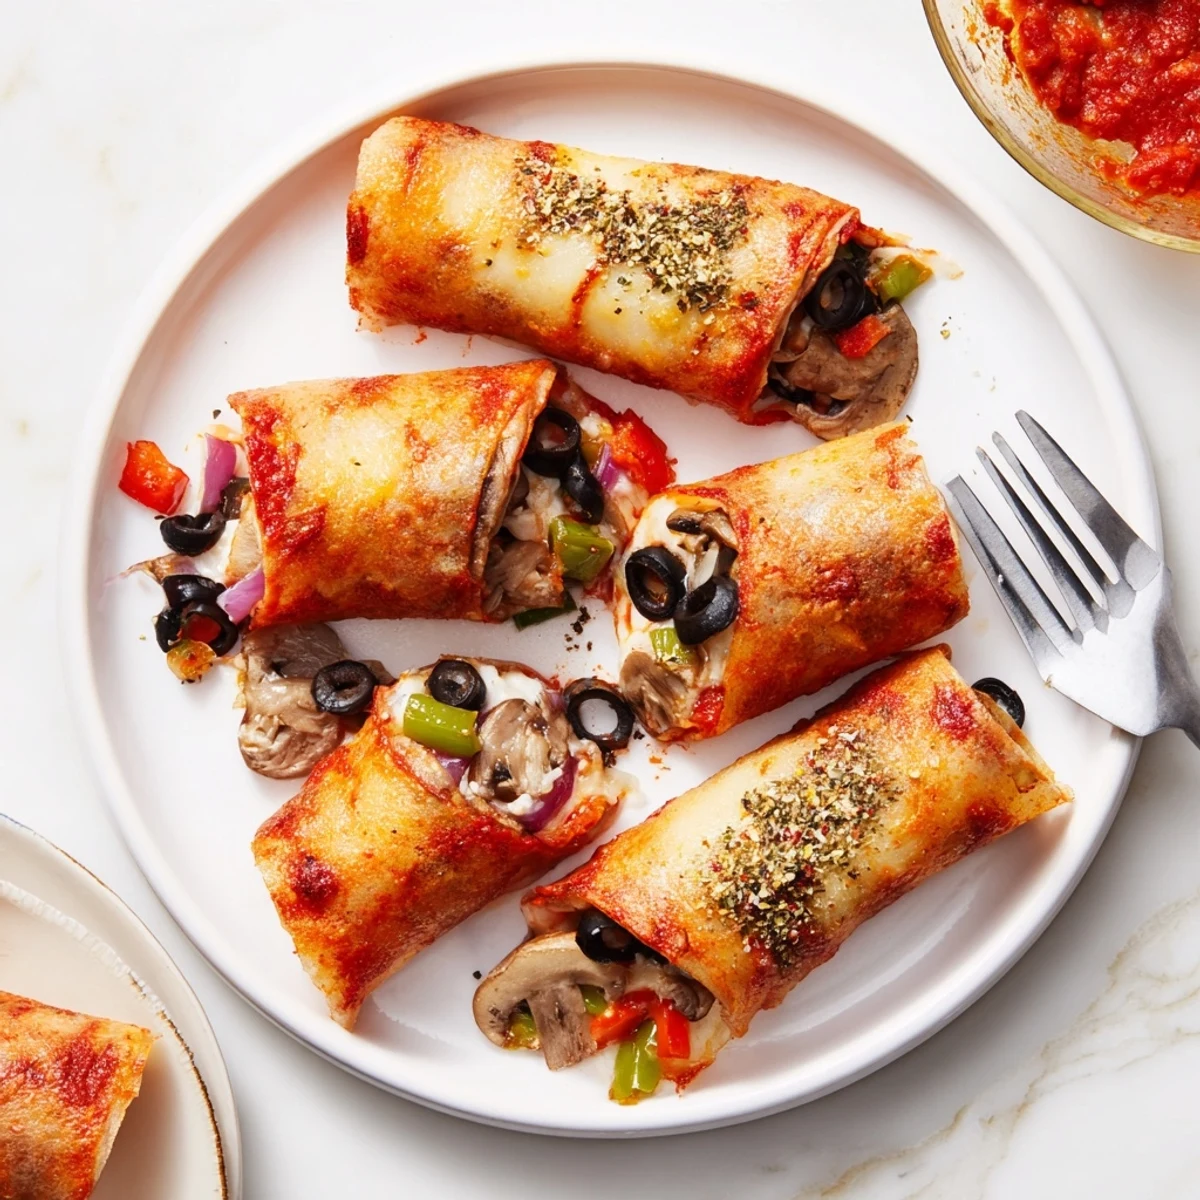
Save These crispy rice paper rolls capture all the beloved flavors of pizza in a handheld format. The wrappers become perfectly golden and chewy when pan-fried, while the mozzarella melting inside creates that irresistible cheese pull. Each bite delivers savory notes from olives, bell peppers, and mushrooms, balanced with aromatic oregano and a hint of heat from red pepper flakes.
Preparing them is straightforward—simply soak the rice paper until pliable, add your fillings, and roll tightly. A quick sizzle in olive oil yields beautifully crisp exteriors with warm, gooey centers. Serve alongside extra pizza sauce for dipping to complete the experience.
The first time I made rice paper pizza rolls, my kitchen smelled like a pizzeria and a Vietnamese spring roll shop had a baby. I was experimenting with rice paper leftovers from summer roll making, and somehow pizza toppings ended up on the counter. The crispy-chewy texture that came out of the skillet made my roommate pause halfway through chewing and ask what kind of magic I'd just discovered.
I brought a platter of these to a potluck last summer and watched them disappear in record time. My friend Sarah, who claims to hate rice paper wrappers in traditional spring rolls, ate five and asked for the recipe before she even finished her last bite. There's something about the familiar pizza flavors meeting that unexpected crispy wrapper that makes people instantly curious.
Ingredients
- 12 rice paper sheets: These become your pizza crust, so don't skimp on quality. The round ones work best for even rolling and consistent crisping.
- 1 cup shredded mozzarella cheese: Low-moisture mozzarella melts beautifully without making your rolls soggy, though I've learned the hard way that fresh mozzarella needs to be patted dry first.
- 1/2 cup pizza sauce: Thick marinara or pizza sauce works better than watery tomato sauce, which can make the rice paper tear during rolling.
- 1/2 cup sliced black olives: These bring that salty pizza parlor flavor, but feel free to swap them for anything your pizza-loving heart desires.
- 1/2 cup diced bell pepper: Any color works here. Red adds sweetness, green brings a bit more crunch and bite.
- 1/2 cup sliced mushrooms: They shrink when they cook, so don't be afraid to pile them on a bit generously.
- 1/4 cup finely chopped red onion: The fine chop is crucial here so you don't get big onion chunks that can make the wrapper tear.
- 1/2 tsp dried oregano: Dried herbs work better than fresh here because they won't add moisture that makes the rolls soggy.
- 1/4 tsp crushed red pepper flakes: Totally optional, but I've never regretted adding that little background heat.
- 2 tbsp olive oil: This is what creates that beautiful golden crust. Don't be tempted to skip or reduce it.
Instructions
- Set up your wrapping station:
- Fill a large shallow bowl with warm water and have all your ingredients prepped and ready. Clear a large cutting board or damp kitchen towel for rolling. Once that rice paper hits the water, you'll need to move quickly.
- Soften the rice paper:
- Dip one sheet into the warm water for 5 to 10 seconds. You want it pliable but not completely floppy. Lay it flat on your prepared surface, smoothing out any wrinkles with damp fingers.
- Add the sauce:
- Spread about 1 teaspoon of pizza sauce in the center third of the wrapper. Keep it away from the edges, or you'll have sauce leaking everywhere during frying.
- Layer your toppings:
- Pile on a small amount of mozzarella, olives, bell pepper, mushrooms, and onion. Don't overfill or the wrapper will tear. A light sprinkle of oregano and red pepper flakes goes on last.
- Roll like a pro:
- Fold in the sides first, then roll from the bottom up, tucking the filling in tightly as you go. It should feel snug but not so tight that the wrapper tears. The seam should be on the bottom.
- Crisp them up:
- Heat olive oil in a nonstick skillet over medium heat. Place rolls seam-side down and cook for 2 to 3 minutes per side until golden brown and crispy. Work in batches so the pan doesn't get crowded.
- Let them rest:
- Cool for just a couple of minutes on paper towels. This brief wait helps everything set so the cheese doesn't ooze out when you bite in.
 Save
Save These rolls have become my go-to when friends come over for movie night because they're basically finger food pizza that feels special. Last week my niece helped me make them and insisted on adding pineapple to half the batch. I was skeptical, but she was right. The sweetness balanced the salty olives perfectly.
Make Them Your Own
The filling combinations are endless once you get the basic technique down. I've made breakfast versions with scrambled eggs and cheese, dessert ones with Nutella and bananas, and even taco-inspired rolls that disappeared faster than I could photograph them. The rice paper wrapper is just waiting for your favorite flavor combinations.
Baking Option
Sometimes I don't want to deal with hot oil on the stove, especially during summer when the kitchen is already warm from cooking. Brushing the rolled pizza rolls with olive oil and baking them at 400°F for 12 to 15 minutes, flipping once halfway through, gives you similar results with less fuss and practically zero cleanup.
Serving Ideas
These pizza rolls are substantial enough to be a light dinner when served with a big green salad on the side. I've also packed them cold for picnics, where they develop this chewy texture that's completely different from hot but equally addictive.
- Set up a toppings bar and let everyone customize their own rolls
- Double the recipe and freeze uncooked rolls between layers of parchment paper for easy weeknight dinners
- Cut finished rolls in half diagonally for easier appetizer serving at parties
 Save
Save Sometimes the simplest ideas are the best ones. These rice paper pizza rolls started as a kitchen experiment and turned into something I make at least once a month now.
Recipe FAQs
- → What makes rice paper get crispy?
-
When rice paper is pan-fried in olive oil over medium heat, the moisture evaporates and the starches crisp up, creating a texture that's both crunchy and pleasantly chewy. Cooking for 2–3 minutes per side achieves optimal golden-brown color and crispiness.
- → Can I bake these instead of frying?
-
Absolutely. Brush the rolls lightly with oil and bake at 400°F (200°C) for 12–15 minutes, turning once halfway through. This method yields slightly less crispy results but reduces the fat content significantly.
- → How do I prevent rice paper from tearing?
-
Don't oversoak the rice paper—5–10 seconds in warm water is sufficient. Work on a damp towel to prevent sticking, and fold the sides in before rolling from bottom to top. Handle gently but firmly to create a tight seal.
- → Can I make these ahead of time?
-
You can assemble the rolls several hours ahead and store them refrigerated between layers of parchment paper. However, they're best cooked fresh. If precooked, reheat in a 350°F oven for 5–7 minutes to restore crispiness.
- → What other fillings work well?
-
Try diced pepperoni, cooked Italian sausage, spinach, fresh basil, or sun-dried tomatoes. For a gourmet version, add artichoke hearts or caramelized onions. The rice paper wrapper adapts beautifully to various flavor combinations.
- → Are rice paper wrappers gluten-free?
-
Most rice paper wrappers are naturally gluten-free as they're made from rice flour, water, and salt. However, always check the package labels to ensure no cross-contamination or added gluten-containing ingredients.