 Save
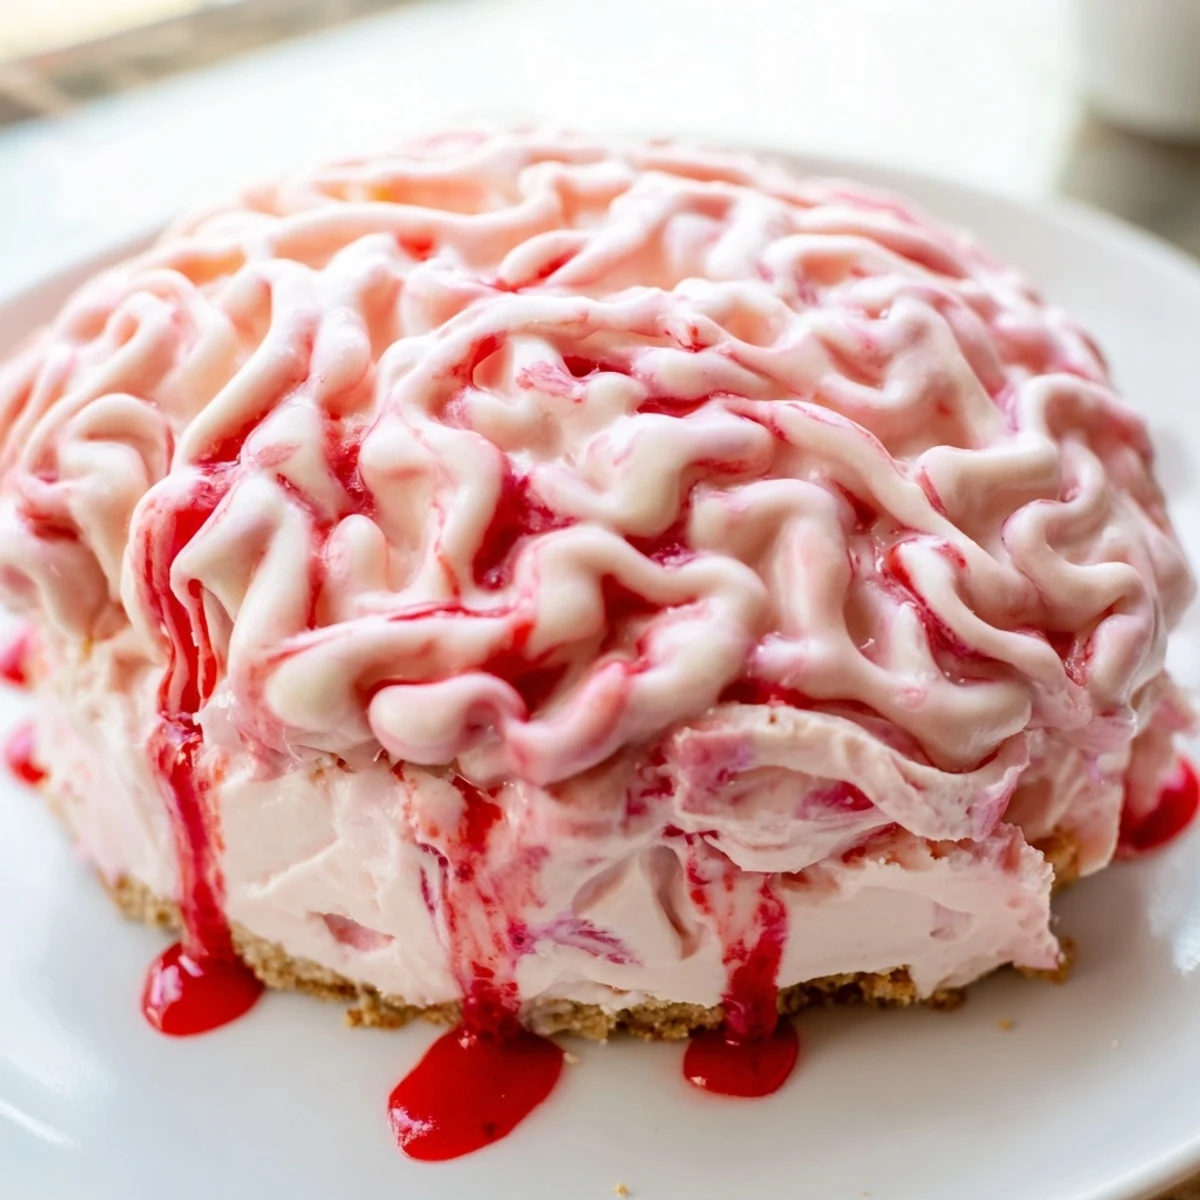
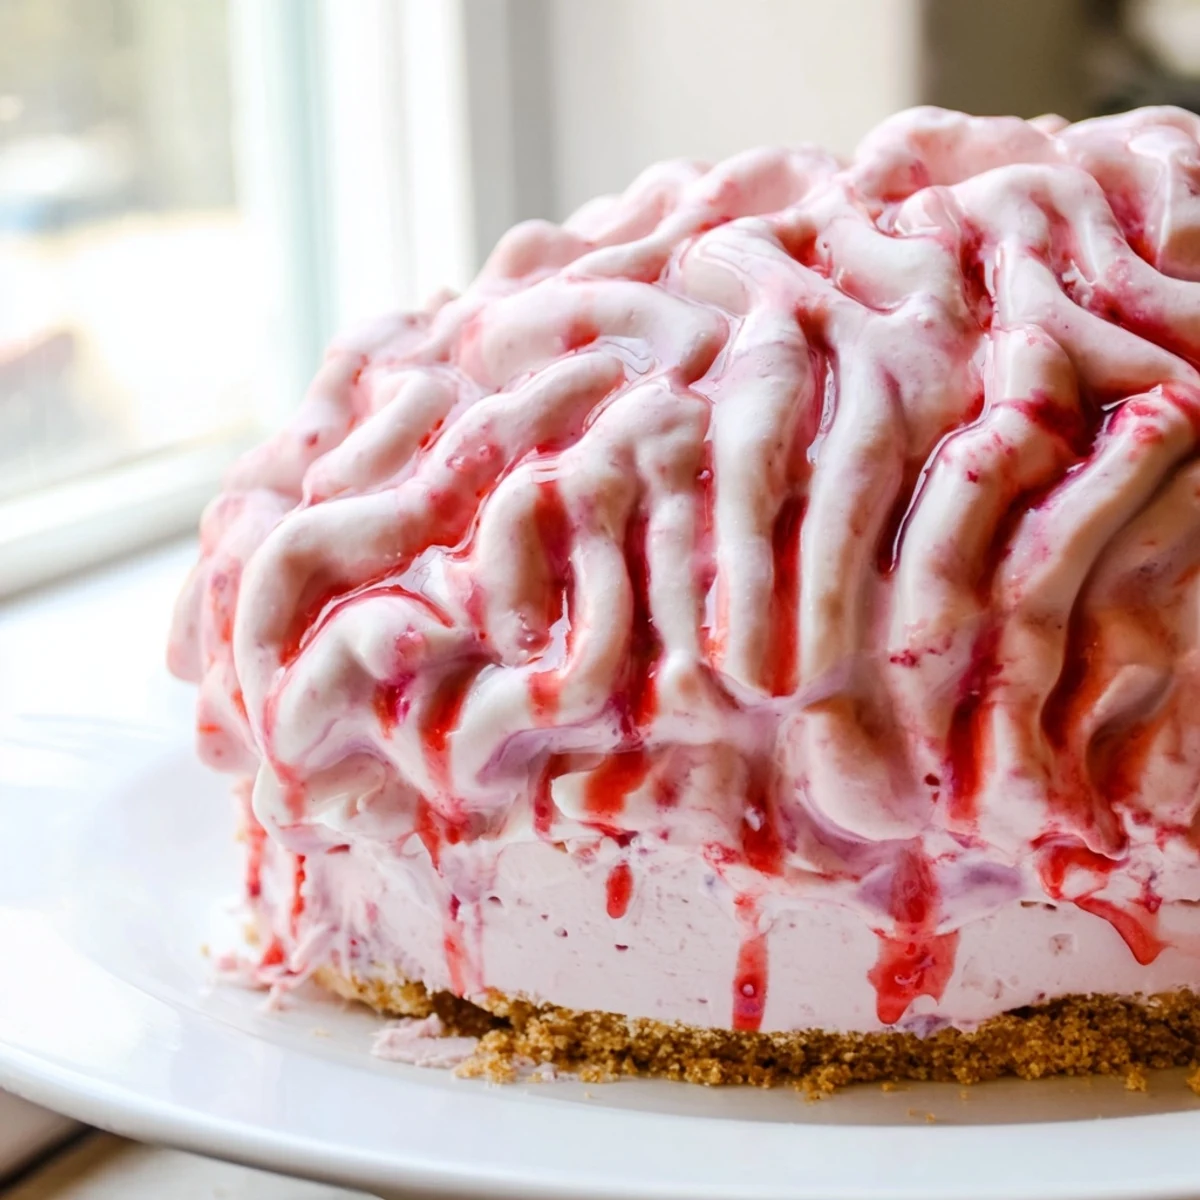
Save This haunting dessert features a creamy strawberry-infused cheesecake filling swirled with gelatin-set fresh strawberry puree, all resting on a buttery graham cracker crust. The entire creation is molded into an eerie brain shape, then decorated with piped white chocolate squiggles mimicking cerebral folds and drizzled with vivid red berry coulis for maximum gory effect. The no-bake method means you simply chill for five hours until set, making it an impressive yet stress-free centerpiece for your Halloween spread or any themed celebration.
Last Halloween, my guests actually gasped when I brought this to the table. The white chocolate squiggles look eerily realistic swirled over that bright pink filling, and honestly, it is just as delicious as it is grotesque. My friend Sarah refused to try it for twenty minutes because she said it looked too convincing.
I accidentally discovered that piping the white chocolate while slightly warm gives these organic, lopsided folds that look way more authentic than trying to be precise. The first year I made these, I practiced the squiggles on parchment paper three different times until my hands stopped shaking.
Ingredients
- 200 g graham crackers: The sandy texture creates the perfect structural foundation, and crushing them by hand actually helps you control the final crumb size better than a food processor.
- 75 g unsalted butter, melted: Room temperature butter melts more evenly and binds the crust without leaving greasy pockets that can make your brain slide around during serving.
- 400 g fresh strawberries: Ripe, fragrant berries are non-negotiable here because the strawberry layer needs to carry most of the flavor impact.
- 2 tbsp granulated sugar: This small amount helps draw out natural strawberry juices without overpowering the delicate cream cheese balance.
- 2 tbsp water: Lukewarm water activates the gelatin more effectively than cold, preventing those annoying grainy bits in your finished layer.
- 2 tsp gelatin powder: Sprinkle this slowly rather than dumping it all at once to avoid clumping that creates weird jello-like pockets.
- 400 g cream cheese: Absolutely must be room temperature or you will end up with tiny lumps that ruin the smooth brain texture.
- 100 g powdered sugar: The cornstarch in powdered sugar helps stabilize the cream mixture while dissolving instantly without graininess.
- 200 ml heavy cream: Cold cream whips faster and holds air better, giving your brain that lighter-than-air consistency despite its ominous appearance.
- 1 tsp vanilla extract: Pure vanilla adds this warm background note that keeps the strawberry from tasting one-dimensionally fruity.
- 200 g white chocolate: High-quality white chocolate melts smoother and pipes better than cheap brands, plus the fat content helps it set firmly at room temperature.
- Pink gel food coloring: Gel coloring is more concentrated than liquid, so you need less and will not water down your chocolate texture.
- Extra strawberry coulis: Having this ready in a squeeze bottle makes those bloody drip marks look spontaneous rather than carefully placed.
Instructions
- Prepare your brain vessel:
- Line a brain-shaped silicone mold with plastic wrap, pressing it into all the crevices and folds so your cheesecake will release perfectly later without losing those important anatomical details.
- Build the skull base:
- Crush the graham crackers until they resemble fine sand, then stir in melted butter until every crumb is coated and the mixture holds together when squeezed. Press this firmly into the bottom of your mold, creating an even foundation, and refrigerate while you work on the filling.
- Create the bloody layer:
- Blend the strawberries with sugar until completely smooth, then heat your water in a small saucepan and sprinkle the gelatin over the surface. Let it bloom for five minutes until it looks wrinkled, then warm gently while stirring until dissolved completely. Stir this gelatin mixture into your strawberry puree and set aside to cool, because adding hot gelatin to cream cheese will cause curdling.
- Make the creamy brain matter:
- Beat the room temperature cream cheese and powdered sugar until no lumps remain and the mixture looks glossy. In a separate bowl, whip the heavy cream to soft peaks that just hold their shape when you lift the whisk. Fold the whipped cream into the cream cheese mixture along with the vanilla, being gentle to maintain all that air you just incorporated.
- Combine and pour:
- Drizzle the cooled strawberry gelatin mixture over your cream cheese base and fold gently until you have a uniform pink color with no obvious streaks. Pour this beautiful pink mixture over your chilled crust, smoothing the top carefully, and refrigerate for at least five hours or until the center feels completely firm when gently pressed.
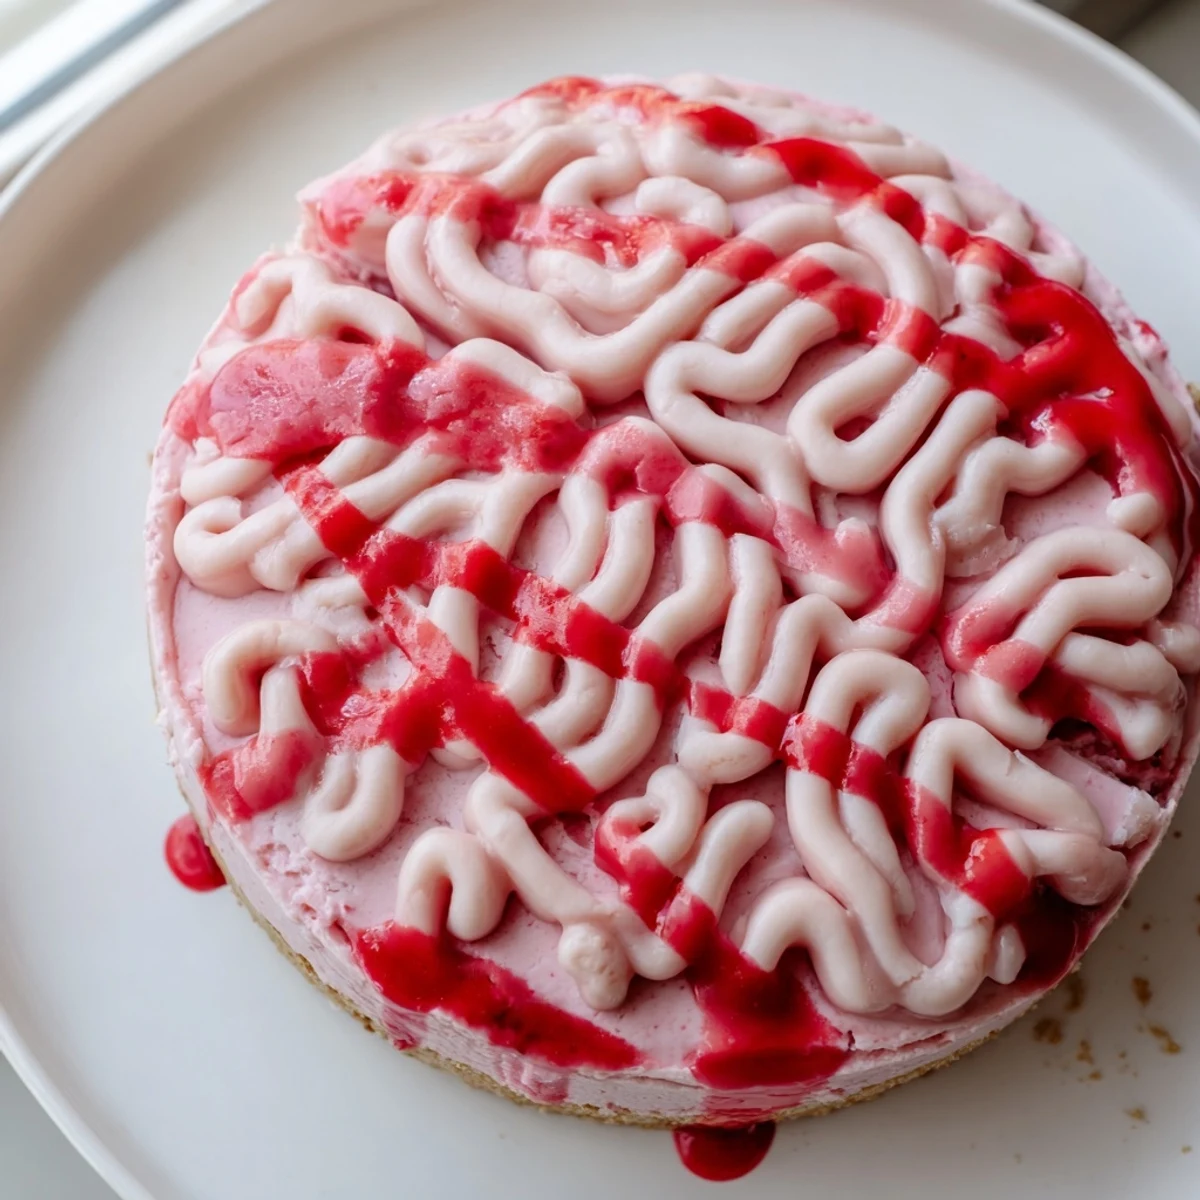
- Sculpt the brain folds:
- Melt the white chocolate carefully and stir in a tiny amount of pink gel coloring until you reach a sickly fleshy tone. Transfer to a piping bag and pipe squiggly lines onto parchment paper, making them slightly irregular and organic looking. Chill these chocolate decorations until firm, then carefully unmold your cheesecake and arrange the squiggles across the surface to create those characteristic brain folds.
- Add the final gore:
- Drizzle extra strawberry coulis or berry sauce randomly across the brain surface and let it drip naturally down the sides for that freshly exposed effect. Slice and serve chilled while your guests try to decide whether to be impressed or terrified.
 Save
Save My niece called it the coolest thing she had ever seen, then proceeded to eat three slices while making exaggerated crunching noises. It has become a tradition now, and honestly, I get more excited about planning the brain decoration each year than any other part of our Halloween menu.
Mold Magic
Brain-shaped molds have become surprisingly available at craft stores and online during Halloween season, but any oval bowl lined carefully with plastic wrap can work in a pinch. The key is really in the white chocolate piping technique, which creates all the anatomical drama that makes this dessert unforgettable.
Make-Ahead Strategy
The cheesecake itself needs at least five hours to set properly, so I always make it the night before my party. You can pipe the white chocolate decorations up to three days in advance and store them between layers of parchment paper in the refrigerator.
Presentation Perfection
Serving this on a black platter or cake stand makes the pink and white colors pop dramatically against the dark background. The contrast is absolutely striking and immediately sets the spooky mood before anyone even realizes what they are looking at.
- Keep the finished cheesecake refrigerated until serving time, because the white chocolate decorations can start to droop if left at room temperature too long.
- Have extra strawberry sauce ready for guests who want an extra bloody effect on their individual slices.
- Work quickly when transferring the finished brain to your serving platter to avoid damaging those delicate chocolate folds.
 Save
Save Hope your Halloween is properly terrifying and delicious this year.
Recipe FAQs
- → Do I need a special brain-shaped mold?
-
While a brain-shaped silicone mold creates the most authentic look, you can use any medium oval bowl lined with plastic wrap. The key is creating the characteristic rounded shape with enough surface area for piping the chocolate brain details.
- → Can I make this dessert vegetarian?
-
Yes, simply substitute the gelatin with an equal amount of agar-agar powder. Follow the package instructions for proper blooming and dissolving, as agar-agar may require different preparation than traditional gelatin.
- → How far in advance can I prepare this?
-
You can make the entire cheesecake up to 2 days ahead. Keep it refrigerated until ready to serve, then add the white chocolate decoration and berry sauce within a few hours of presentation for the freshest appearance.
- → What if I can't find pink gel food coloring?
-
The strawberry puree naturally provides a lovely pink hue. If you want more intense color, use a few drops of red food coloring or additional fresh strawberry puree. The pink coloring is purely optional for visual effect.
- → Can I use frozen strawberries instead of fresh?
-
Frozen strawberries work perfectly for the puree layer. Thaw them completely before blending, and expect slightly more liquid—simply reduce the added water to compensate for the natural juices from thawing.
- → How do I transport this without damaging the brain decoration?
-
Transport the undecorated cheesecake in its mold or on a sturdy board. Pack the melted white chocolate in a sealed container and pipe the brain squiggles on-site, or carefully place a lightweight cake dome over the finished creation.