 Save
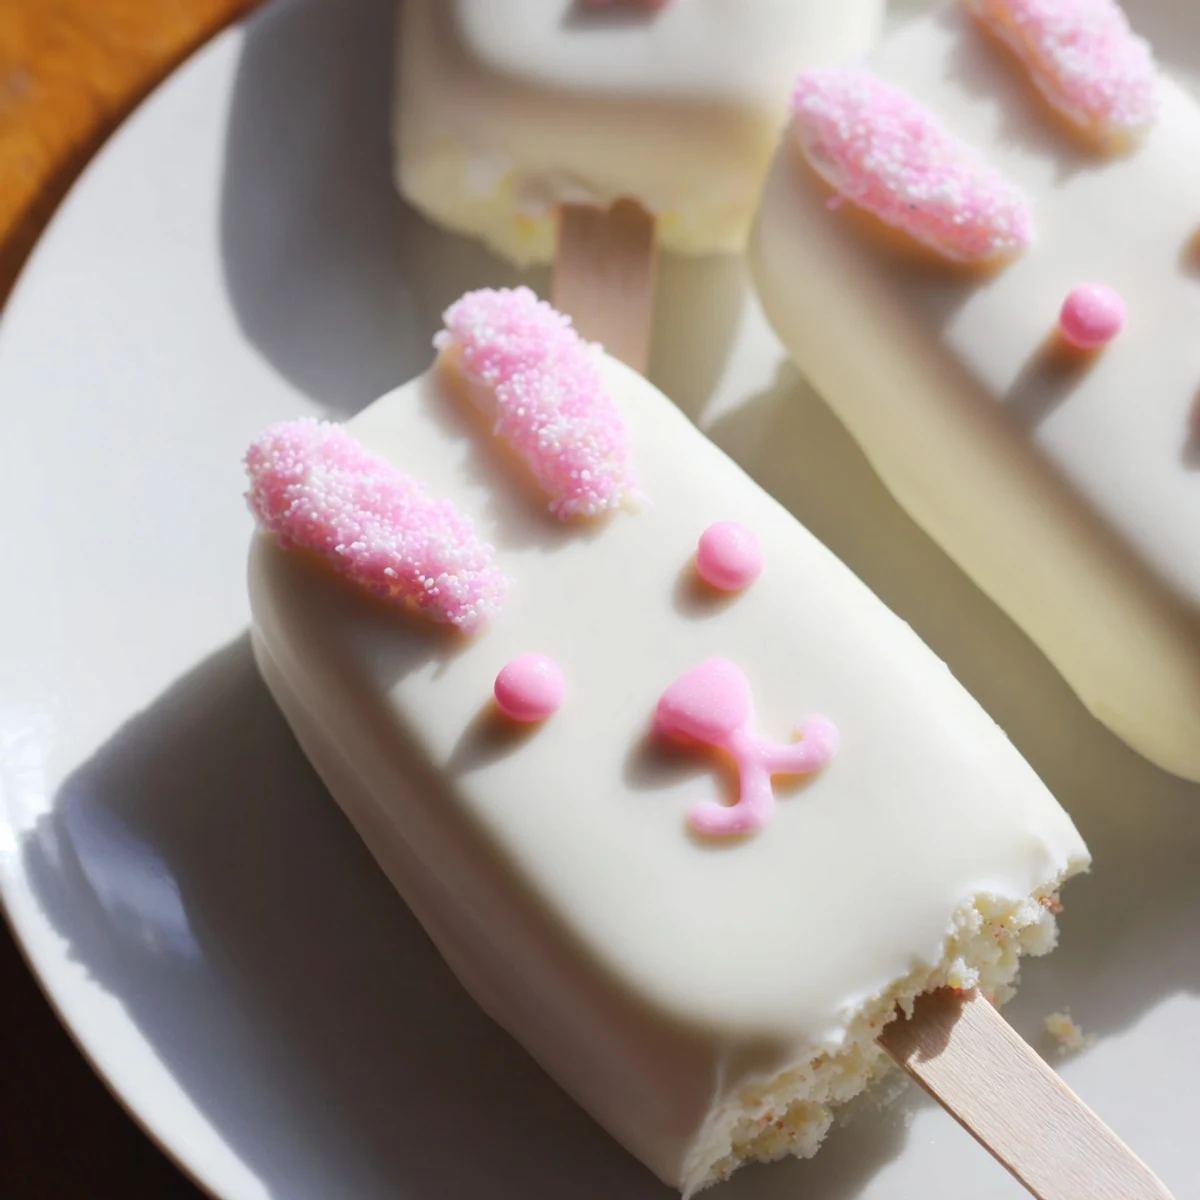
Save These delightful bunny-shaped treats combine moist vanilla cake crumbs with cream cheese and butter, coated in silky white chocolate. The festive Easter dessert features adorable bunny faces complete with ears, noses, and candy eyes. Each cakesicle offers the perfect balance of sweet cake and creamy chocolate coating, decorated with colorful sprinkles and fondant details. The process involves mixing simple ingredients, shaping into bunny faces, chilling for firmness, then dipping in melted white chocolate. Customizable with various cake flavors and decoration options, these handheld treats are ideal for Easter baskets, dessert tables, or spring celebrations.
The kitchen counter was already covered in a thin dusting of powdered sugar when my niece burst in, eyes wide at the sight of the cake pop molds. She'd been begging to help with Easter treats all week, and these bunny cakesicles felt like the perfect compromise—something cute enough for her Instagram feed but messy enough to justify the aprons we were already wearing.
Last year, I made three dozen of these for my daughter's classroom party. The teacher emailed me later that night saying the kids were still talking about the 'bunny lollipops' during circle time, and honestly, seeing those little faces light up when they bit into the chocolate coating made every minute of cleanup worth it.
Ingredients
- 1 cup vanilla cake crumbs: I've learned that slightly stale cake actually works better here—it absorbs the cream cheese mixture without turning gummy, so don't be afraid to use that half-eaten birthday cake sitting on your counter
- 2 tbsp cream cheese: Room temperature is non-negotiable here—I once tried softening it in the microwave and ended up with weirdly warm cake dough that refused to hold its shape
- 1 tbsp unsalted butter: This little bit of fat makes the difference between cake pops that taste like sweetened sawdust and ones that feel like actual cake
- 2 tbsp powdered sugar: Just enough sweetness to bind everything together without making the filling cloying
- 1/2 tsp vanilla extract: Use the good stuff if you have it—the flavor comes through even under all that white chocolate
- 10 oz white chocolate or melts: Candy melts are easier for beginners since they're formulated to melt smoothly, but real white chocolate tastes infinitely better if you're comfortable tempering
- Edible gel food coloring: Gel won't seize your chocolate like liquid coloring does—I learned this the hard way with a disastrous batch of gray bunny faces
- 8 cakesicle sticks: Dip the very tip of each stick into melted chocolate before inserting—it acts like glue and prevents tragic popsicle-to-cake separations
- Sprinkles, candy eyes, or fondant decorations: Keep these nearby and ready to go because that chocolate coating starts setting faster than you expect
Instructions
- Mix your cake dough:
- Combine those cake crumbs with softened cream cheese, butter, powdered sugar, and vanilla in a medium bowl. Use clean hands to really work it together—you're aiming for something that feels like play-dough, not crumbly topping.
- Shape your bunnies:
- Divide the mixture into 8 equal portions, then gently press each into a flattened oval with slightly pointed ears at the top. Don't stress about perfection—slightly lopsided bunnies have more character anyway.
- Prep for dipping:
- Insert a cakesicle stick about halfway into each shape, wiggling it slightly to create space. Pop them in the fridge for at least 20 minutes until they're firm to the touch—this step is what prevents tragic stick accidents during dipping.
- Melt the coating:
- Microwave your white chocolate in 30-second bursts, stirring thoroughly between each round. Stop when it's just smooth and pourable—overheating makes white chocolate seize into an unworkable grainy mess.
- Dip and tap:
- Holding each cakesicle by the stick, dip it straight down into the melted chocolate until completely coated, then gently tap your wrist against the bowl to let excess chocolate drip off. Work quickly but calmly—panic dipping leads to splatters.
- Add decorations while wet:
- Immediately press candy eyes, sprinkle noses, or fondant ears onto the soft chocolate coating. The chocolate sets faster than you think, so have all your decorations laid out and ready before you even start dipping.
- Set and finish:
- Stand each cakesicle upright in a styrofoam block or glass filled with uncooked rice to set without developing flat spots. If you want to add details with food coloring pens, wait until the coating is completely firm.
 Save
Save My sister still talks about the Easter Sunday our entire family gathered around the kitchen table, each of us working on our own batch of bunny faces. Her kids insisted the ones with three eyes were 'alien bunnies' and refused to eat anything else, creating a new accidental tradition that continues to this day.
Making These Ahead
You can form and refrigerate the unbunny shapes up to 24 hours before dipping, but I'd recommend waiting to coat them until the day you're serving. White chocolate starts looking tired after a day, developing those unappetizing gray streaks that make everyone wonder if they're still fresh.
Decoration Ideas Beyond Bunnies
Last spring I made an entire garden's worth—carrot shapes with orange candy melt coating, lambs using white chocolate and shredded coconut for wool, and even tiny chick faces with yellow coating and orange sprinkle beaks. The same dough works for absolutely any shape you can imagine.
Serving And Storing
I've found these taste best at room temperature, when the white chocolate coating has softened slightly but the cake inside is still firm. If you're serving them outside, consider setting up a shaded station—there's nothing sadder than a melted bunny face sliding down its stick.
- Stand finished cakesicles upright in a mason jar filled with jelly beans for the cutest Easter centerpiece
- Wrap individually in clear cellophane bags tied with pastel ribbon if you're gifting them
- Keep them in the fridge but bring them out 15 minutes before serving for the best texture
 Save
Save There's something impossibly satisfying about breaking into that crisp white chocolate shell and hitting the soft, creamy cake center. Easter treats come and go, but there's always room for another batch of these bouncy little bunnies.
Recipe FAQs
- → How long do cakesicles stay fresh?
-
Store cakesicles in an airtight container in the refrigerator for up to 3 days. The chilled environment keeps the white chocolate coating firm and maintains freshness.
- → Can I use different cake flavors?
-
Absolutely! Chocolate, lemon, red velvet, or any favorite cake flavor works perfectly. Simply use the corresponding cake crumbs instead of vanilla.
- → What if the coating is too thick?
-
Add a teaspoon of coconut oil or vegetable shortening to the melted white chocolate. This creates a smoother, thinner consistency for easier dipping.
- → Do I need a cakesicle mold?
-
No mold required! Hand-shaping the mixture into flattened bunny ovals works perfectly. However, molds help create uniform shapes if you prefer consistency.
- → Can I make these ahead for Easter?
-
Yes! Prepare cakesicles 1-2 days before Easter. Store refrigerated in a sealed container. Add delicate decorations like fondant ears closer to serving time.
- → What creates the bunny face details?
-
Use candy eyes, fondant shapes for ears and noses, edible food coloring pens, or sprinkles. Pretzel sticks and modeling chocolate also make excellent features.